In this small series I will show you how to use Arduino IDE with ESP8266 and log your temperature data to the MySql server trough Node Red. And for data transmission we will use MQTT.

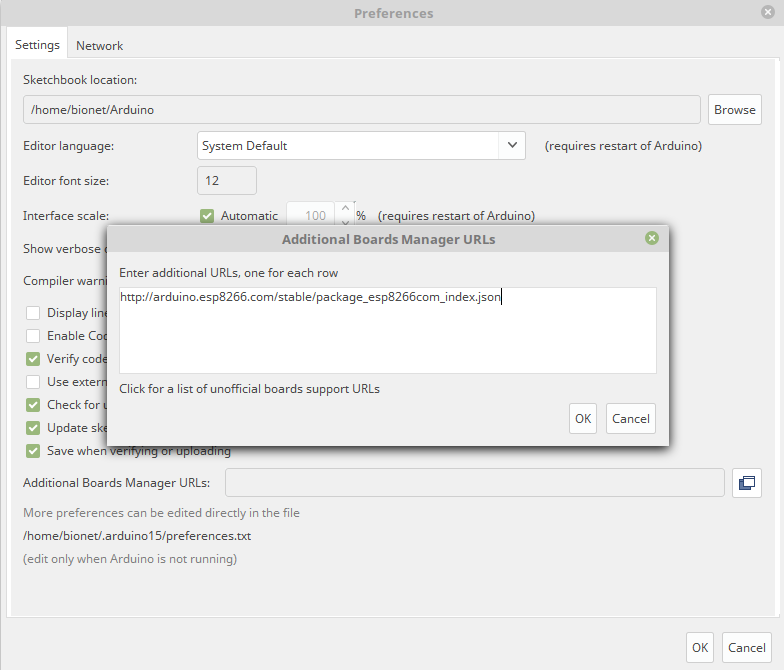
- Installing the Addon With the Arduino Boards Manager. Open up Arduino, then go to the Preferences (File > Preferences). Then, towards the bottom of the window, copy this URL into the “Additional Board Manager URLs” text box:
http://arduino.esp8266.com/stable/package_esp8266com_index.json
- Hit OK. Then navigate to the Board Manager by going to Tools > Boards > Boards Manager. There should be a couple new entries in addition to the standard Arduino boards. Look for esp8266. Click on that entry, then select Install.
- When the board is installed Select “NodeMCU 1.0” from the Tools > Boards menu.

- Then select your port number under the Tools > Port menu.
- Now lets upload a blink sketch for a test.
void setup() {
  pinMode(LED_BUILTIN, OUTPUT);     // Initialize the LED_BUILTIN pin as an output
}

void loop() {
  digitalWrite(LED_BUILTIN, LOW);   // Turn the LED on (Note that LOW is the voltage level
                                    // but actually the LED is on; this is because
                                    // it is acive low on the ESP-01)
  delay(1000);                      // Wait for a second
  digitalWrite(LED_BUILTIN, HIGH);  // Turn the LED off by making the voltage HIGH
  delay(2000);                      // Wait for two seconds (to demonstrate the active low LED)
}
For faster upload you can choose Tools > Upload Speed > 921600 but faster upload speed can be slightly less reliable.
After uploading the sketch the led will blink and we are ready to get to the next step…

Leave a Reply